Hey, everybody! Welcome to the YJC Knowledge corner. Today, we’ve got a fresh topic for you: “What Is Silicone Compression Molding.” We’re super stoked that you, amidst your busy schedules, chose to swing by and read our article. Now, let’s jump right into the fun stuff and unravel the mysteries of this intriguing process!
Silicone Compression Molding involves placing un-vulcanized Liquid Silicone Rubber (LSR) material into each half of the mold cavity. The assembled mold is then introduced to a heated compression molding press, where the silicone undergoes vulcanization, resulting in the formation of a molded part. While this process is comparatively slower than injection molding, it offers expedited turnarounds for prototypes and R&D phase parts, coupled with cost-effective tooling.
The Process of Silicone Compression Molding:
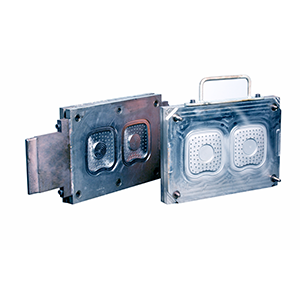
Step 1: Mold Preparation
Begin with the meticulous preparation of a metal mold designed to replicate the product. Machining, casting, and electroforming are employed in creating these heated metal molds, ensuring precision in dimensions and shapes crucial for the desired outcome.
Step 2: Molding Machine Setup
The chosen molding machine undergoes thorough cleaning, mechanical checks, and calibration to ensure flawless functionality. Different machine types, utilizing various pressing mechanisms, require specific preparations tailored to the silicone compression molding process.
 Step 3: Silicone Readiness
Prepare the silicone charge, emphasizing the manual inspection by qualified technicians to guarantee quality, quantity, and specifications. Select materials, conduct tests, and perform necessary operations before cutting and placing the charge onto the molds.
Step 4: Charge Placement
Place the silicone charge onto the bottom cavity, using the top part as a lid and press to ensure even distribution on the mold. This step, essential for preventing deformities, can be manual or automated for large-scale production.
Step 5: Compression Initiation
Start the compression machine, initiating the compression process based on the method, product type, and design complexity. Solid sheets of silicone undergo curing through cross-linking processes, defining material properties such as hardness and resistance.
Step 6: Sampling and Quality Control
During the compression process, eject samples for quality control analysis. Cross-check initial molds with desired outcomes, ensuring product expectations are met and allowing for iterative refinement.
Step 7: Finalizing Manufacturing
Conclude the silicone compression process by stopping the machine, ejecting cooled molded products, and executing essential post-production activities.
Advantages of Utilizing Silicone Compression Molding
- Cost-Effective Efficiency:Compression molding delivers cost-effective production with low costs and high-quality outcomes, ensuring optimal value for businesses.
- Versatile Applications:Widely applicable across industries, compression molding offers versatility in creating a diverse range of high-quality products.
- Streamlined Process:The straightforward nature of compression molding simplifies manufacturing processes, appealing to both product dealers and manufacturers for its efficiency.
- Large-Size Product Capability:Ideal for large-size products, compression molding’s adaptable mold sizes provide precision and flexibility in production.
Now that we’ve unraveled the intricacies of “The Process of Silicone Compression Molding” and explored its awesome advantages, we’ve got a pretty solid grasp of this nifty technique. But hey, if your curiosity is still doing a little victory dance and you’ve got more burning questions or ideas swirling in your mind, don’t be shy! Give me a shout, and I’ll be your guide through the silicone wonderland. The knowledge party is still on, and I’m here to keep it lively and entertaining!